Blog › AI Product Photo for Packaging
How to stage a packaging product photo with AI, and catch what it changes
 By Nguyễn Thành Dân, Founder of Drint ·
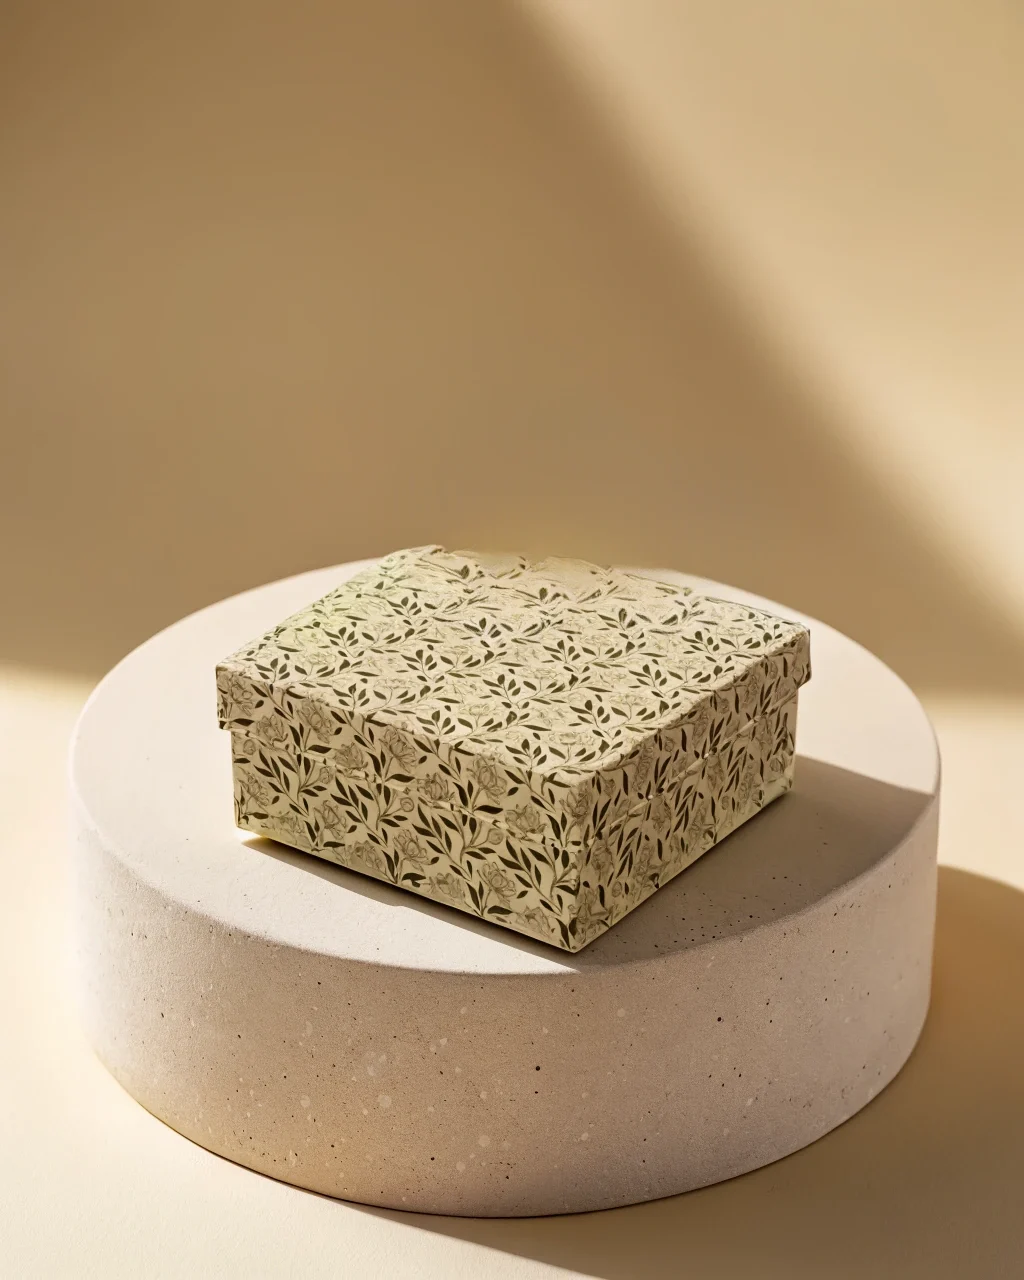
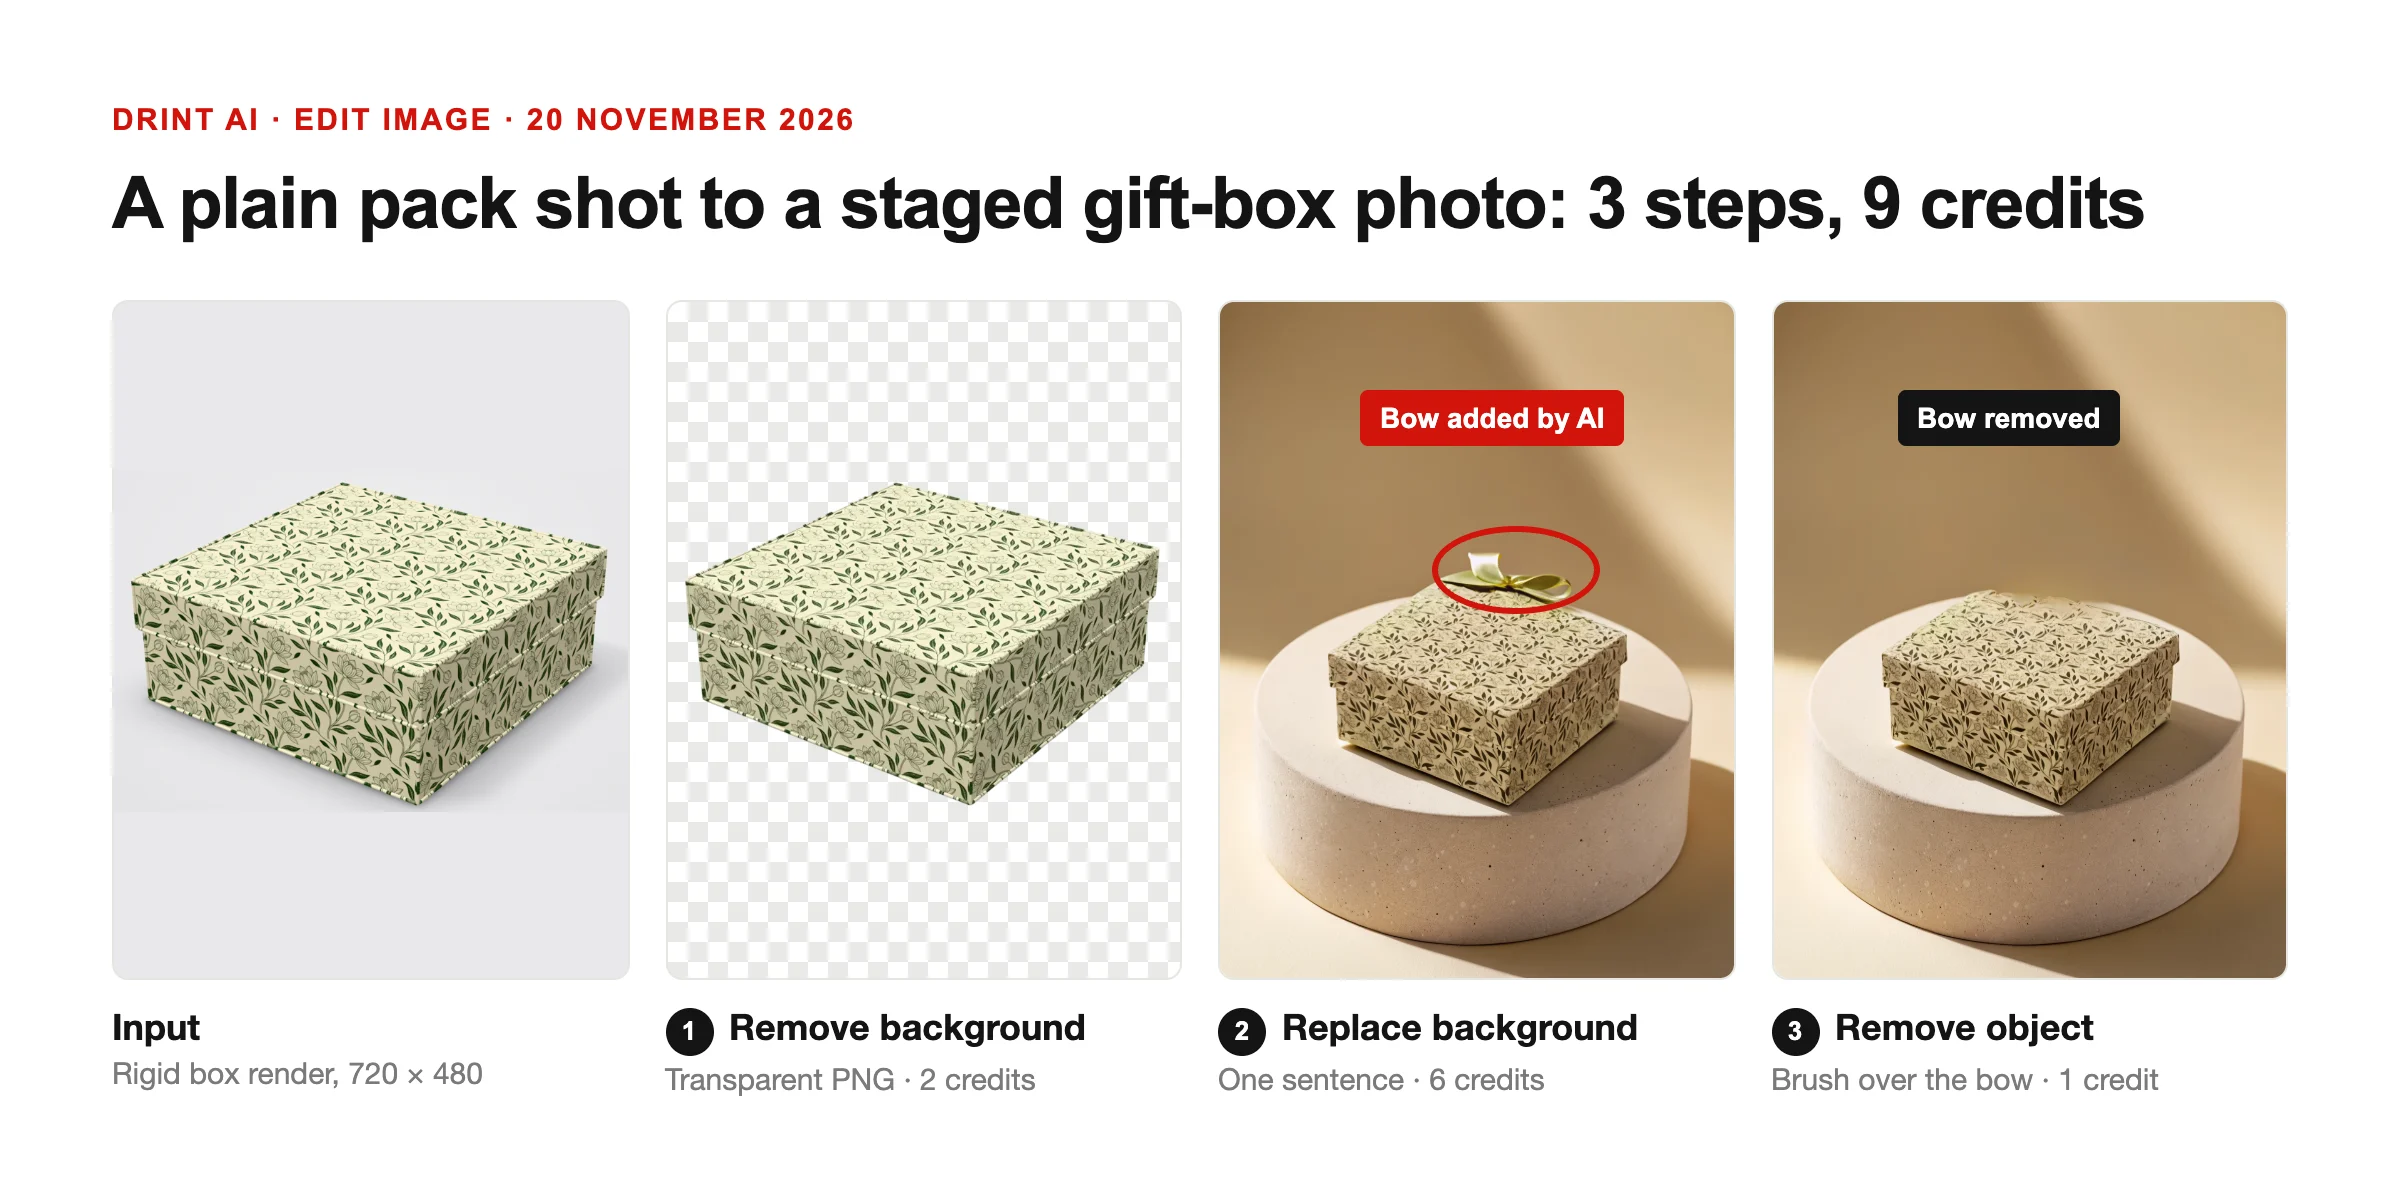
AI can turn a plain pack shot into a staged product photo in minutes, but it can also change the product. On 20 November 2026, Drint AI moved a rigid gift box onto a stone plinth in 3 steps for 9 credits. The background step added a satin bow the box does not have. One more step removed it.
Why it matters: a product photo is a promise about the product. A bow, a new lid colour or an extra label in a listing picture is a product the buyer will not receive. This guide shows the steps, the settings and the check that caught the change.
Key points
- 3 steps, 9 credits: remove background (2 credits), replace background from one sentence (6), remove object (1).
- The AI changed the product: the replace background step added a green satin bow on the lid. The box has no bow.
- Remove object fixed it: one brush stroke over the bow, 1 credit. At 100%, the back edge of the lid is smudged where the bow was.
- Leave room under the product: the box stood on the plinth only after it was shrunk to about half the frame width, with its base at about 72% of the height.
- Marketplaces have rules: Amazon wants a pure white main image; Google Merchant Center asks sellers to keep the AI label in the file.
What we started with
The "product photo" here is a Drint 3D render of a 180 × 180 × 70 mm lid and base box, wrapped in the lotus pattern from our AI pattern guide. It stood in for a studio shot: grey background, no props, 720 × 480 pixels.
A render keeps client artwork out of the test. The steps are the same for a phone photo of a real box.
Step 1: Remove the background
Open Drint AI, go to Edit image and drop in the photo. Press Remove background (2 credits). The result is a transparent PNG at the same size, 720 × 480.
Check the edges at 100% before you go on. A soft or chewed edge here carries into every later step.
Step 2: Make room, then replace the background
The first attempt failed for a reason that had nothing to do with AI. The product filled most of the frame, so there was no room to draw a plinth under it. The AI drew the plinth behind the product instead.
What worked:
- Frame: 1024 × 1280 pixels, a 4:5 portrait shape that suits most shop listings.
- Product size: about half the frame width.
- Product position: centred, with the base of the box at about 72% of the height. That leaves the bottom quarter for the plinth top.
Then type the scene in From a sentence and press Replace background (6 credits). The sentence used:
the gift box rests on top of a low round pale travertine plinth, its base on the flat top of the plinth, plain warm beige studio backdrop, soft daylight from the left, a gentle shadow on the plinth, minimal luxury product photography
Name where the product sits ("its base on the flat top of the plinth"), the light direction and the shadow. A sentence that only says "luxury background" leaves the AI to guess the floor.
Step 3: Check the product, not just the scene
The scene came back right: plinth, beige wall, diagonal sunlight. The box did not. A green satin bow sat on the lid.
Nothing in the sentence asked for a bow. "Gift box" and "luxury" were enough for the model to add one. Background tools are meant to keep the product as it is, but they redraw the pixels at its edges, and that is where this one added detail.
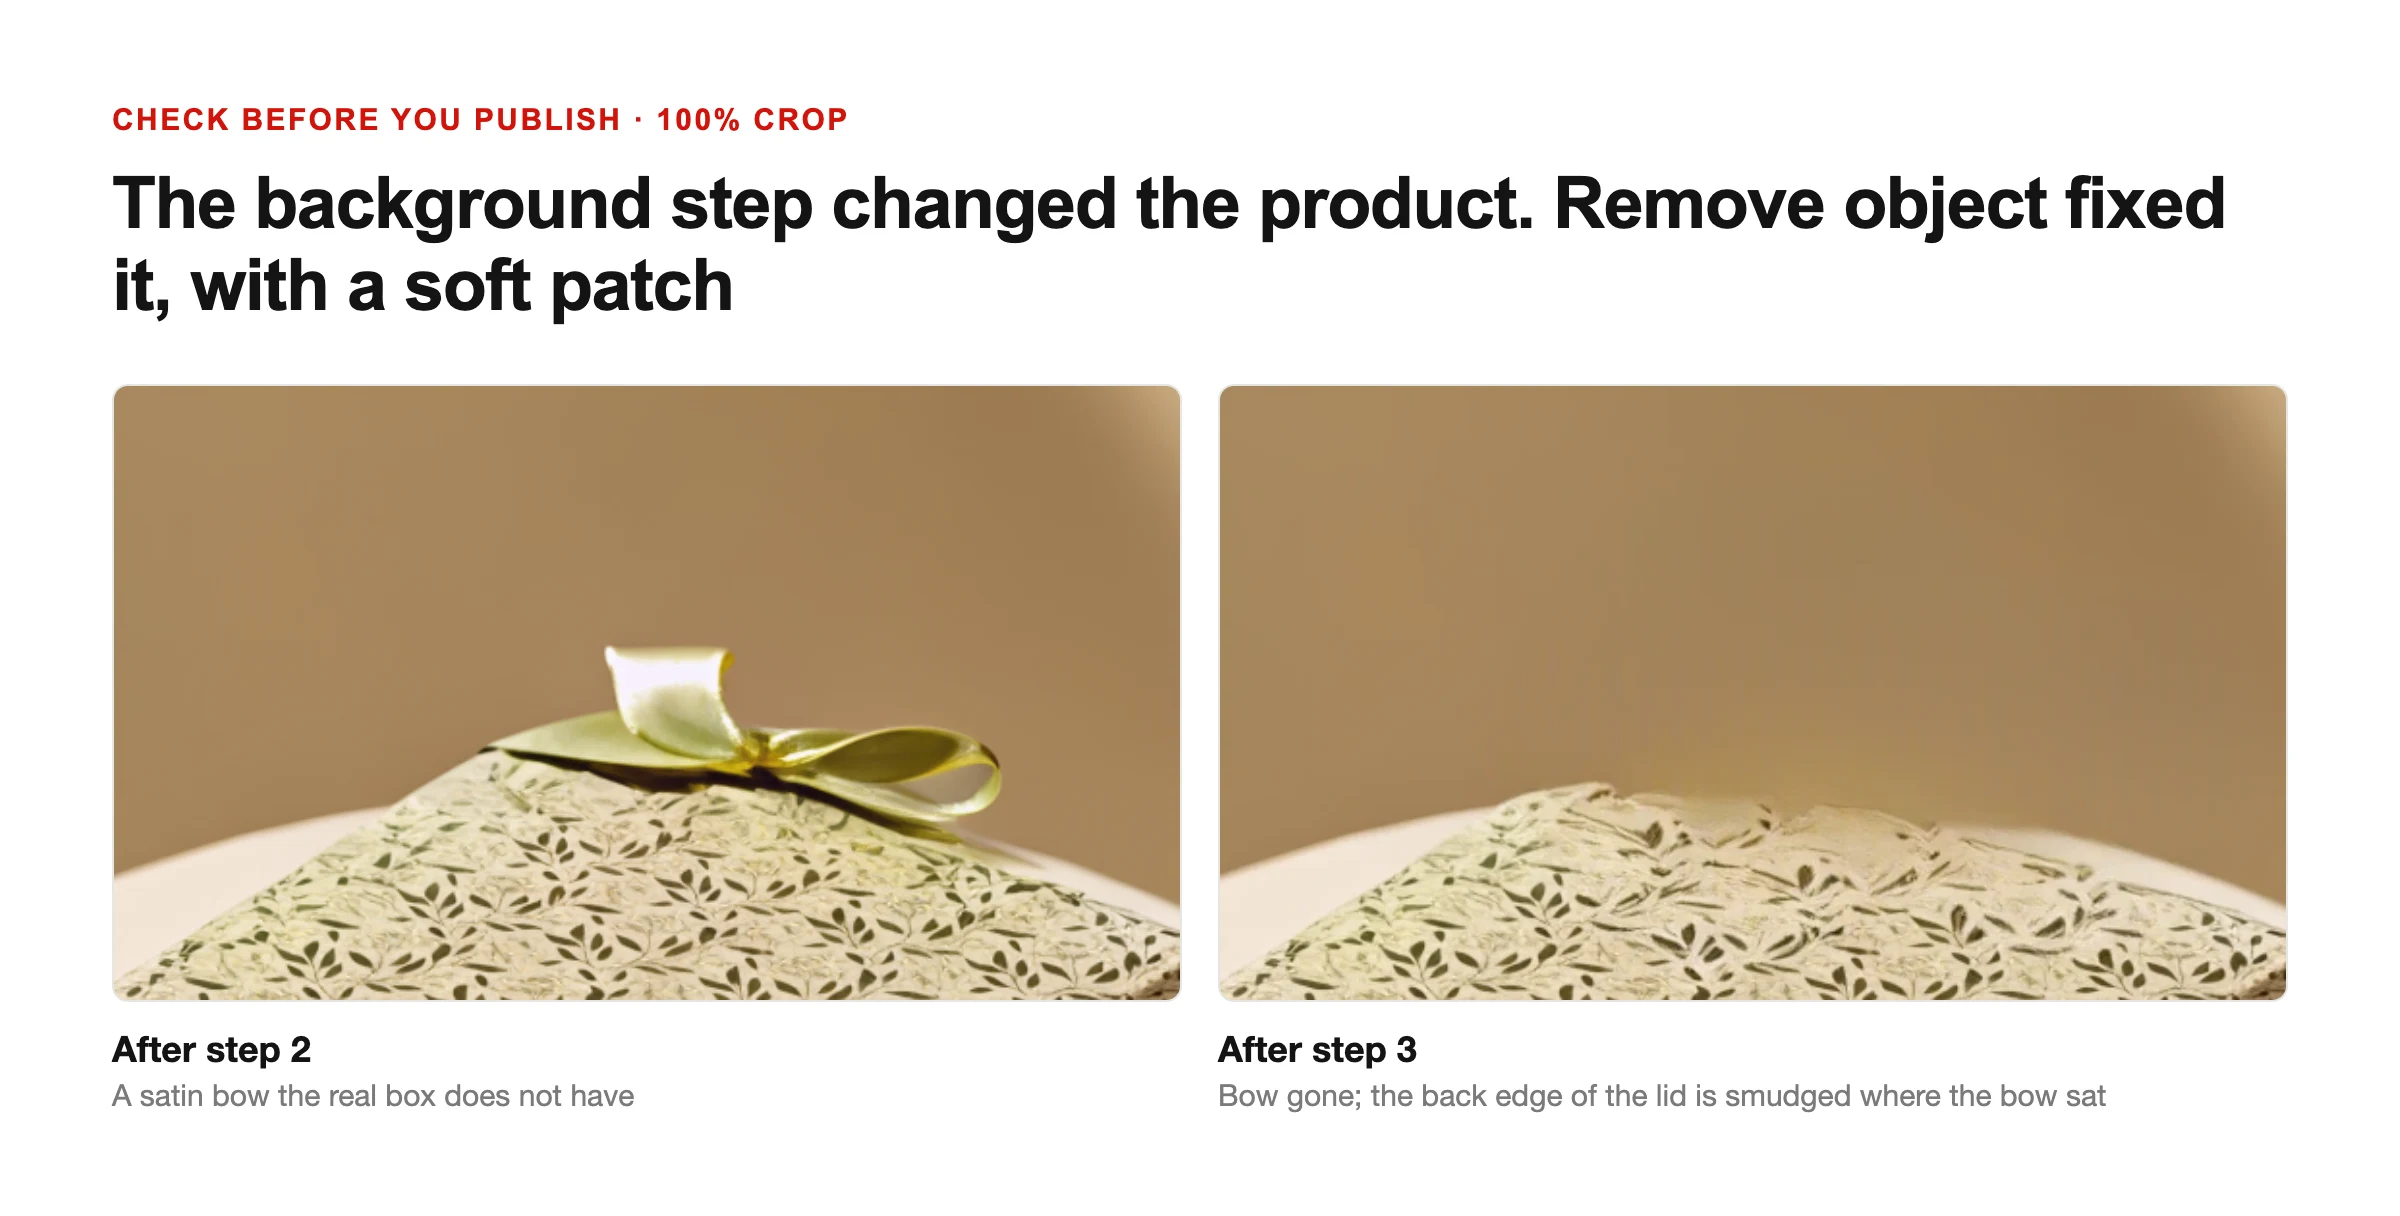
Compare the product in the new picture with the original, side by side, at 100%. Look for:
- Added parts: bows, ribbons, handles, seals, caps.
- Changed shape: a lid that grew taller, rounded corners on a square box.
- Changed print: pattern scale, colour, a logo or text that was redrawn.
Step 4: Remove what the AI added
Press Remove object, brush over the bow and a little of the lid around it, then press Remove (1 credit). The bow went, and the lid pattern was drawn back in.
It was not perfect. At 100%, the back edge of the lid is smudged where the bow sat. At listing size, around 1,000 pixels, it reads as soft light. For a large hero crop, rerun the step or start step 2 again.
A note from the test: on the morning of 20 November 2026, Remove object and Redraw area failed in Drint AI for every user. Our AI provider had started to refuse colour mask files and accept only greyscale ones. Drint fixed this the same day, before step 4 was run.
Where a staged photo can be used
Shops treat a styled scene differently from a main product image.
- Amazon: the main image needs a pure white background, RGB 255, 255, 255, according to Amazon's Seller Central help. A plinth scene belongs in the extra images.
- Google Merchant Center: Google asks sellers using AI-generated images to keep the metadata that says so, the IPTC
trainedAlgorithmicMediatag, in the file. - The EU: Article 50(2) of the EU AI Act requires AI tools to mark the images they generate or manipulate in a machine-readable way. It has applied since 2 August 2026; tools already on sale have until 2 December 2026. See what Article 50 requires of AI images.
Drint AI writes that mark into each picture it makes. Our earlier test found that some editors and converters drop it, so check the file you upload.
What this means for designers
Check the product as closely as the scene. A client approves the box, not the backdrop, and an added bow is an unapproved change to the pack.
Keep the original photo next to every AI version until the client signs off. If the product changed, say so, fix it, or go back to a real photo.
Disclosure: Drint wrote this guide about its own product. Drint AI needs the AI Pro plan, with 800 credits a month. The steps above cost 9 credits; the failed first layout cost more.
Sources
- Product image requirements, non-white background, Amazon Seller Central, accessed 20 November 2026
- Preserving metadata tags for AI-generated images in Merchant Center, Google, accessed 20 November 2026
- Digital Source Type vocabulary, IPTC, accessed 20 November 2026
- Regulation (EU) 2024/1689, the AI Act, Article 50, EUR-Lex, accessed 20 November 2026
- Drint test, 20 November 2026: steps, sentence, sizes and credit costs read from Drint AI › Edit image and History; crops made from the original output files.
Next step / Try it
Open Edit image in Drint AI with a pack shot of your own, or design a lid and base box and render it first.
Frequently asked questions
Can AI change my product when it replaces the background?
Yes. In this test, the replace background step added a satin bow to a plain rigid box. Compare the product with the original at 100% after every AI step.
How do I make the product stand on a plinth instead of in front of it?
Leave room under it. Shrink the product to about half the frame width and put its base at about 72% of the height, then say in the sentence where the base sits.
How do I remove something the AI added?
Use Remove object: brush over the added part and a little around it. Check the area at 100%, because the refilled pattern can come back soft.
Can I use an AI-staged photo as my Amazon main image?
No, not as a scene. Amazon asks for a pure white background on the main image. Use staged scenes as extra images.
Do I have to label AI-edited product photos?
Google Merchant Center asks sellers to keep the AI metadata in the file. In the EU, the AI tool must write a machine-readable mark. Keep the mark Drint AI writes, and check that your export keeps it.